
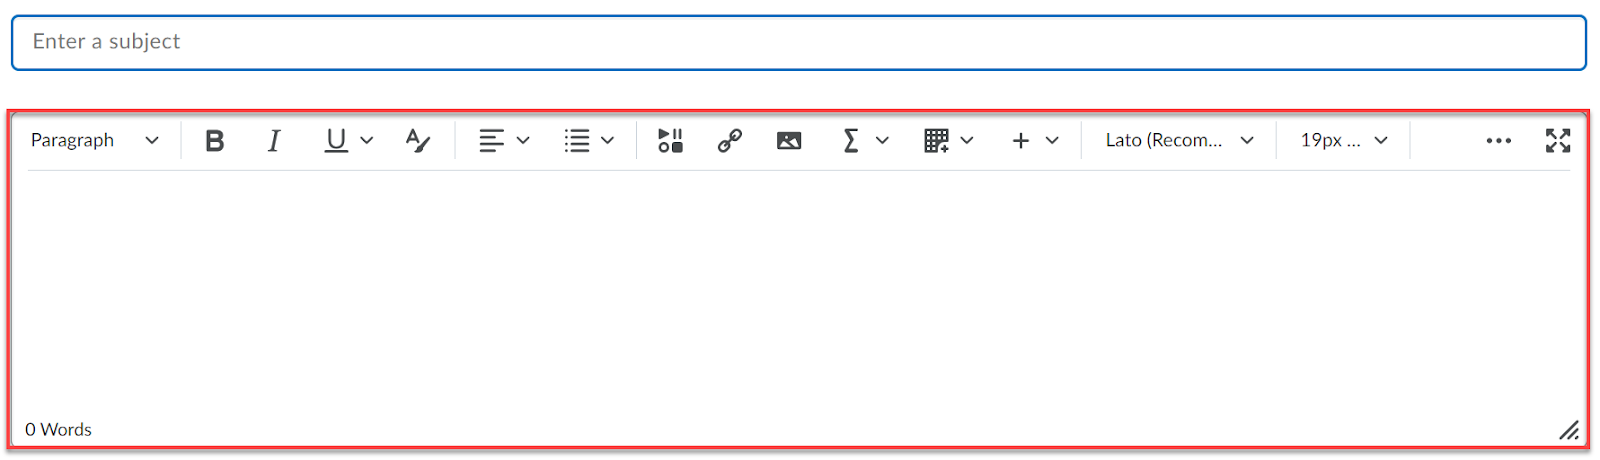
The MyFIRE Editor is the primary method of creating
instructions and content in the learning environment. The editor textbox can be
found in many tools throughout MyFIRE. It allows users to enter text, pictures,
embed audio/video, or even embed HTML code. This tutorial demonstrates how to
utilize the many functions of the editor tool within MyFIRE.
1. Paragraph: This option allows the user to switch
between text format levels. Options include paragraph, heading, blockquote, and
code format sizing.


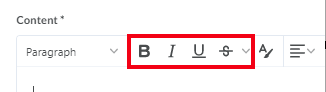
2. Font Emphasis: The MyFIRE Editor has multiple
options that match those of common word processing software: bold, italics,
underline, strikethrough, superscript, and subscript. Strikethrough,
superscript, and subscript are available through the drop-down menu.

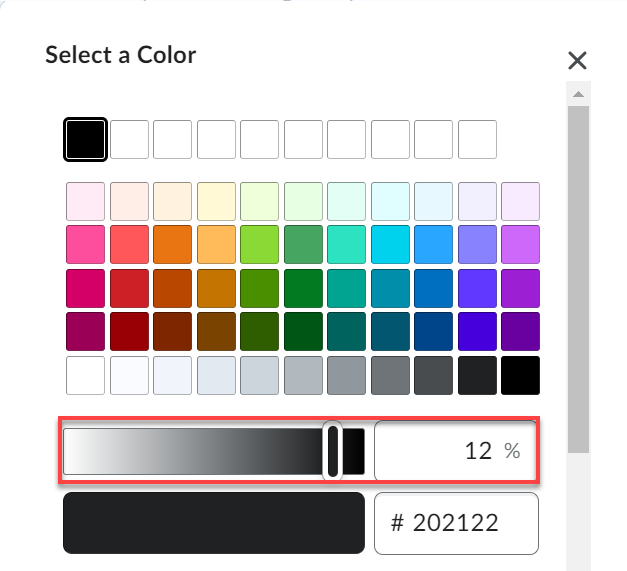
3. Font Color: This option allows users to change the color of the font within the
message by selecting the font color icon. A pop-up window will appear.
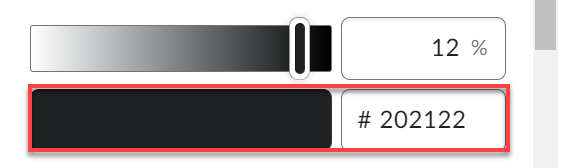
a. Users can select the desired color and shade of
the specified color. The shade or value of the color can be selected by
choosing a color tile, moving the sliding bar, or entering the desired
percentage of the color.
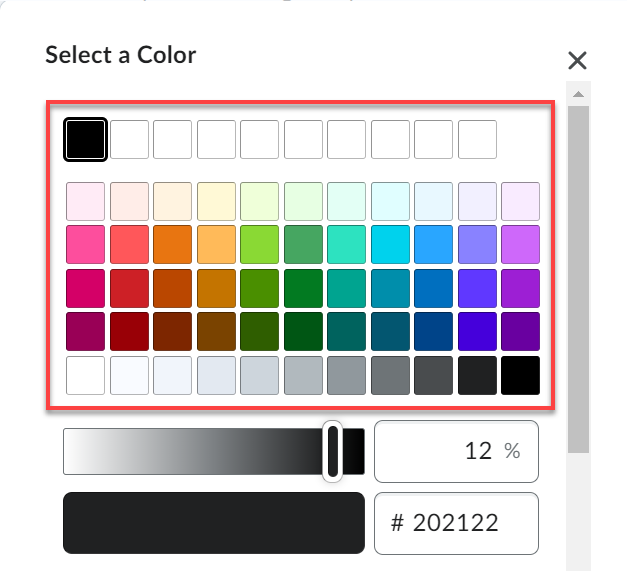
b. If users have a specific color, users can type
or paste the specified hex color code in the text field.
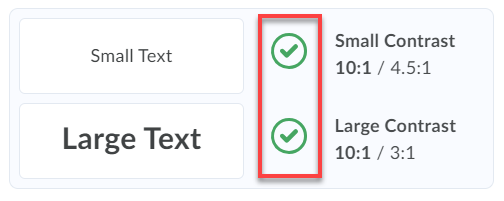
c. When selecting or changing colors in the
message, users will be able to confirm if the desired color passes the WCAG
(Web Content Accessibility Guidelines) compliance checker. The WCAG checker
will check font and color ratios to help users ensure that the message that is
being created will be accessible. It is best practice to ensure that both the
small text and large text have green checkmarks next to them as you change
colors.
d. Once done selecting the desired color, select
save at the bottom of the pop-up window.
4. Alignment: This option allows users to set the
alignment of content in messages.

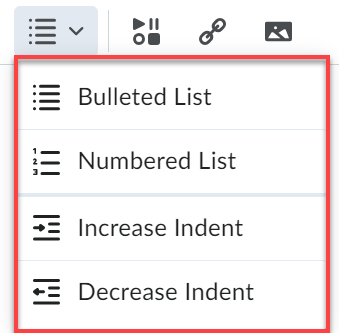
5. Lists & Indentations: This option allows
users to include lists, increase indentation, and decrease indentation in
messages.
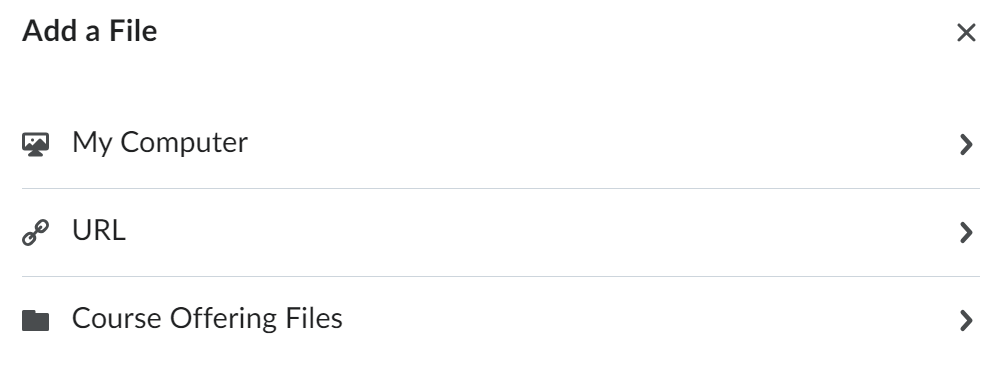
6. Insert Stuff: This option allows users to add a
variety of elements to be inserted including files from the computer, files
from the course, shared files, ePortfolio files, video notes (30-minute
recorded video), URL links, and embed codes. Note: If the original files or
links are changed or deleted, the added item will not display properly.

7. Insert Quicklinks: This option allows users to
create a link to internal and external content within the course (Assignments,
Discussions, Quizzes, Surveys, Rubrics, etc.). Once the icon is selected, a
pop-up window will appear.
a. Select the desired tool from the pop-up window.

b. Then select the item from the list that you want
to create a link to in your message. Note: If embedded content is deleted or
altered on the source site, the link created in the course will reflect that
change or could break.

8. Insert Image: This option allows images to be added from one of three sources to a
message:
a. Another option to add an image to a message or
content is to drag and drop or copy and paste an image in the message field.
This functionality is only available in the following areas within the course
that contain no user-specific data:
i. Content
Module/Topic Descriptions
ii. Course
Content Overview Description
iii. Quiz/Survey/Self-Assessment
- Description, Header, Footer, & Feedback
iv. Discussion
Forum/Topic - Descriptions and Feedback
v. Grades
- Comments, Descriptions, and Feedback

9. Equations: This option allows users to add
graphical equations, LaTeX equations, MathML equations, or Chemistry equations
to the message.

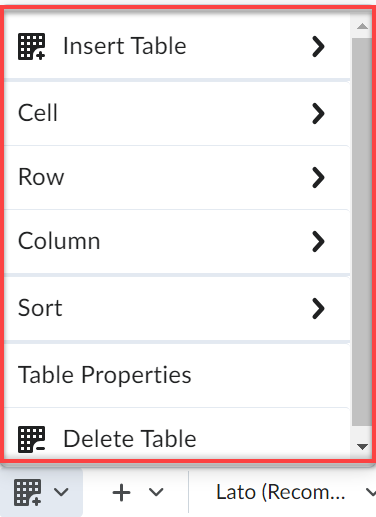
10. Tables:
This option allows users to create and insert tables within messages.
11. Additional
Insert Options: This option allows for users to format messages or content by
inserting attributes, divider lines, emojis, or symbols.
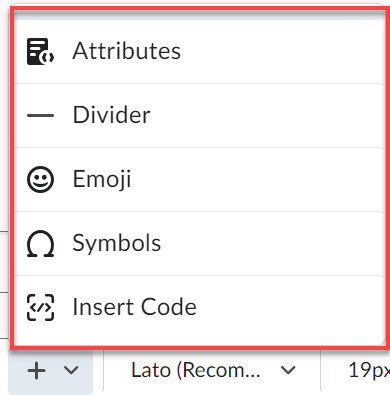
a. Attributes: The attributes feature is a way to
label and style contents in your message for accessibility and coding purposes
by adding an attribute title, ID, class, style, and determine the direction of
the text in the message.
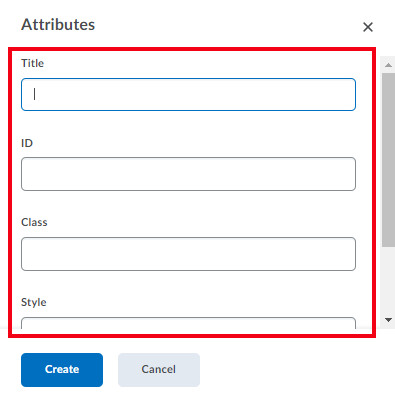
i. Content
must be added to the message in order for the attributes to appear. The title
attribute specifies extra information about a content element. The information
is most often shown as a tooltip text when the mouse moves over the element.

ii. The
attributes appear in the source code of the message.

12. Font
& Font Size: This option allows users to change the font of the message to
a preferred font and font size by selecting the drop-down menus. The font and
size that is selected will show a checkmark icon to the right of the selection.

13. Additional
Tools: To access the additional options, select the ellipsis icon.
14. Expand
Screen: This option allows users to expand the MyFIRE editor to full screen
while creating the content/message. Note: The expanded screen features are
for your view only and do not adjust the view for other users.
a. If toggle to full screen is selected, users can
return to the previous screen by selecting the same toggle screen button.

15. Format
Painter: This option allows users to copy and paste formats in the message.
16. Accessibility
Checker: This option allows users to check if the message contains any
accessibility issues. Note: It is best practice to run the accessibility
checker prior to publishing messages.

a. If there are no issues, then a green success
alert message appears.

b. If there are issues with the message, then a red
error message appears.

i. Depending
on the type of error, the alert message will either provide an option to
correct the error through selecting a repair button or provide a brief
description of what is wrong within the message to help the creator locate and
fix the issue.

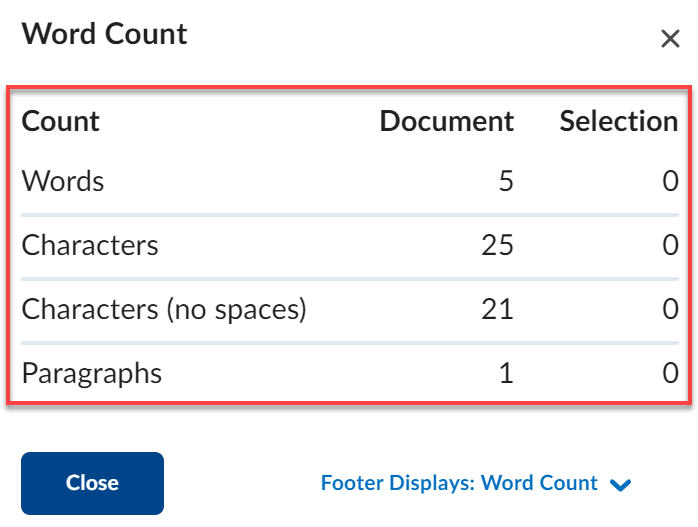
17. Word
Count: This option allows users to view the number of words, characters,
characters with no spaces, and paragraphs that are included in the message.
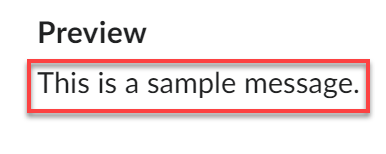
18. Preview:
This option allows users to preview the message that is being created in a
pop-up window.

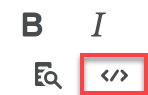
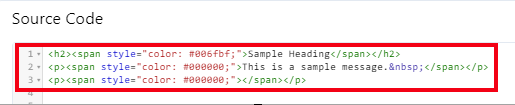
19. Source
Code: This option allows users to create and edit the message through HTML and
CSS coding. If this option is selected, the source code will appear in
different colors to make it easier to identify different elements of the code.
20. Undo
& Redo: These options allow users to undo or redo the previous action.
