
Communicating
with instructors and fellow classmates is simple in MyFIRE. The main form of
directly communicating with your instructor is through the email feature. This
tutorial demonstrates how to contact your instructors and classmates in MyFIRE.
1. Within
a course in MyFIRE, select the course tools tab at the top of the page
in the navigation bar.

2. A
drop-down menu will appear. Select classlist.

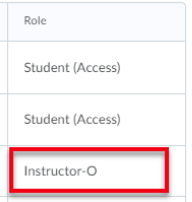
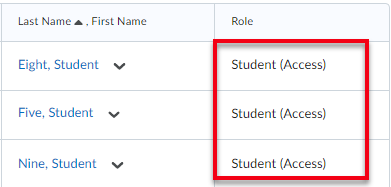
3. When
the page refreshes, a list of users will be displayed. To locate which user is
your instructor, under the Role column, locate the Instructor role.
Fellow students will be listed as Student (Access) in the role column.

4. To
view which users are currently online, look for a green dot to the right
of the user’s name.

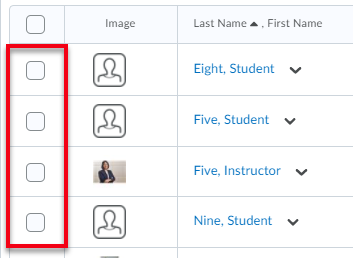
5. To
contact the instructor or fellow classmates, select the checkbox(es) beside the names of the individuals you would like to contact.
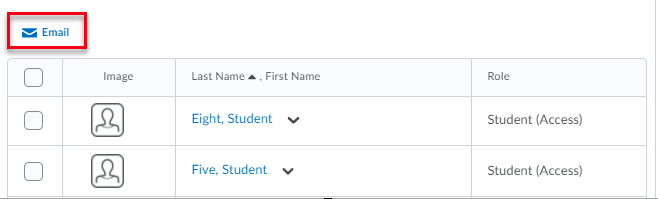
6. Then
select the email option above the classlist.
7. A
pop-up screen will appear showing an email template. The user(s) that you
selected will automatically appear in the “bcc” field. If needed, you can move
the contact from the Bcc field to the “To” field by retyping the user’s
email address in the “To” field.
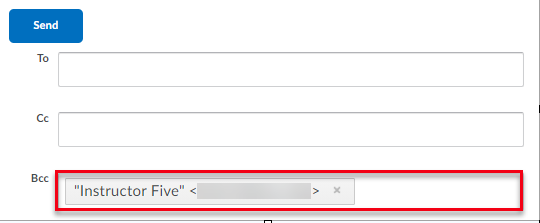
a. If choosing to move the
email address(es) to the “To” field, remove the original email address(es) from
the Bcc field by selecting the “X” icon to the right of the email
address.

8. Within
the subject of the email, the course title will automatically be added. It is
recommended to keep the title in the subject line to help you and the receiver
identify which course you are referencing easier. If desired, add additional
information in the subject line after the right carrot icon.

9. Next, enter your message in the body of the email.
Note: For further
instructions on how to utilize the MyFIRE editor textbox, please refer to the how to utilize the MyFIRE Editor
tutorial.

a. If desiring to invite
your classmates or instructor to an online meeting, select the quicklink icon
in the MyFIRE textbox.

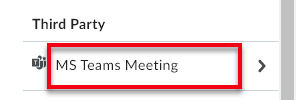
b. A pop-up window will
appear. Scroll down and select MS Teams Meeting to schedule and add a link to
the online meeting. Microsoft Teams is apart of Office 365 which is available
to all students and employees. Students must accept a licence to have access
to Microsoft Teams. Students can request O365 access through the IT department. Note:
Ensure that you are not selecting any other tools present within the Third
Party quicklink list.
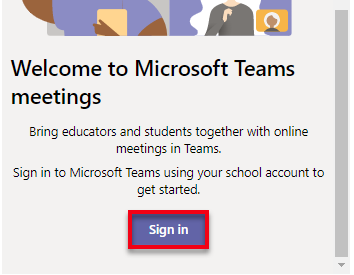
i. Once MS Teams is
selected, a pop-up window will appear. Scroll down the window and select sign
in.
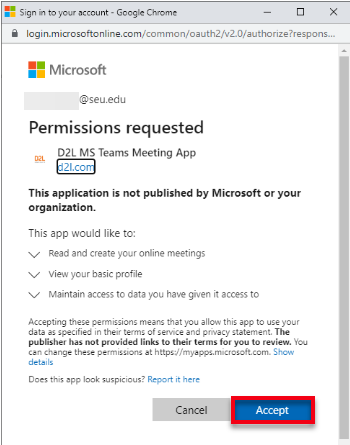
ii. A pop-up window
requesting permissions will appear. Select accept. Note: this step
will need to be completed once.
iii. Once the permissions
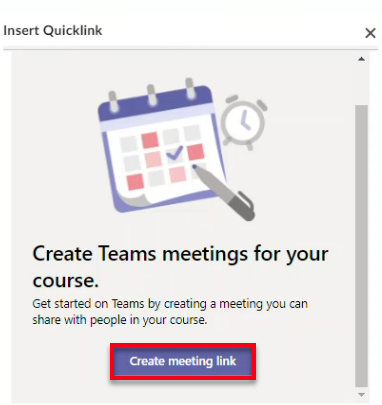
window has closed, select create meeting link at the bottom of the first
pop-up window.
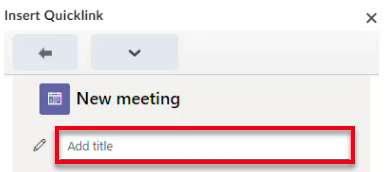
iv. Name the meeting in the title field. The name of the meeting will become the title of the MS
Teams meeting link once it is created. Note: the MS Teams meeting link
cannot be edited once it is created.
v. Add the desired start and end dates and times for the meeting. Note: The
drop-down start time is only listed in 30-minute increments. If starting an
impromptu meeting, manually type the start time in the start time field.

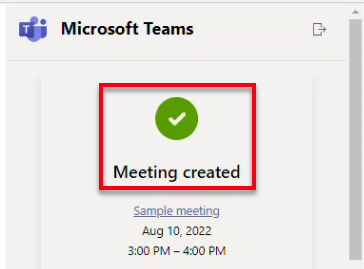
vi. Select create.
vii. The pop-up window will
refresh to confirm that the meeting has been created. Scroll down to the bottom
of the pop-up window and select meeting options.

viii. A
new browser tab will open. Set the desired meeting options.
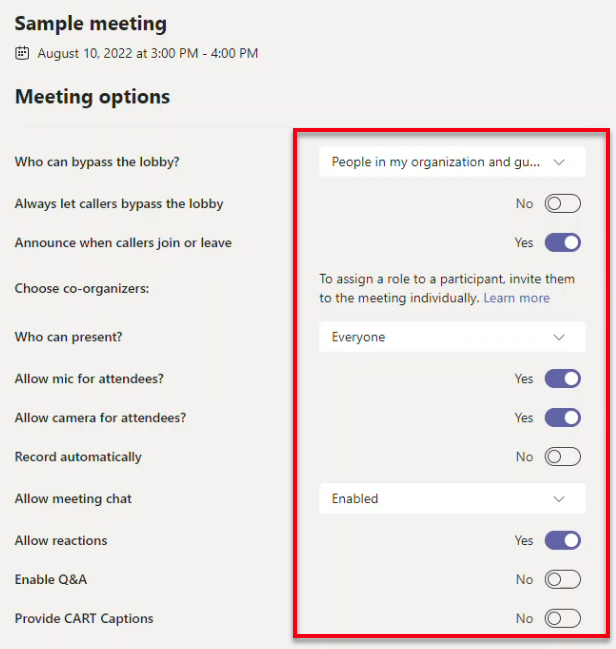
ix. Then select save and close the browser tab.

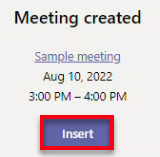
x. Once the meeting
options have been saved, select insert.
xi. The pop-up window will
close and the MS Teams meeting link will be entered in the MyFIRE editor
textbox. Note: the MS Teams meeting link cannot be edited.
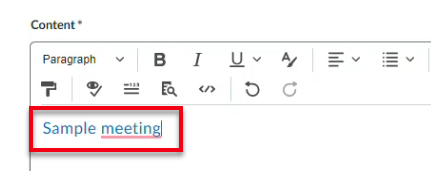
xii. Continue customizing
the email as desired with the meeting date, time, and any additional details needed for the meeting. Then continue to step 10.

10. If
desired, attach a file, record a video or audio message, or attach an item from
your ePortfolio account or pre-recorded video note messages by selecting the
desired option under the Attachments sections.
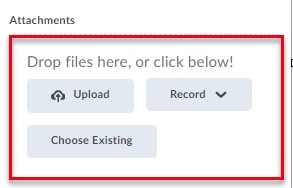
a. Upload- This option will
allow you to upload a file from your computer.
b. Record- This option will
allow you to record up to a 30-minute video message or a 1-minute audio message
directly within MyFIRE. Note: If needed, refer to the ‘How to record a
Video Note’ tutorial.
c. Choose Existing- This option will
allow you to attach an item from your MyFIRE ePortfolio account or from your
MyFIRE video note messages that are already recorded.
11. When
you are finished composing your message, scroll to the bottom of the page and
select send.
Note:
When the email is sent to the instructor or classmate(s), they will receive the
email within their SEU email account within Gmail.
